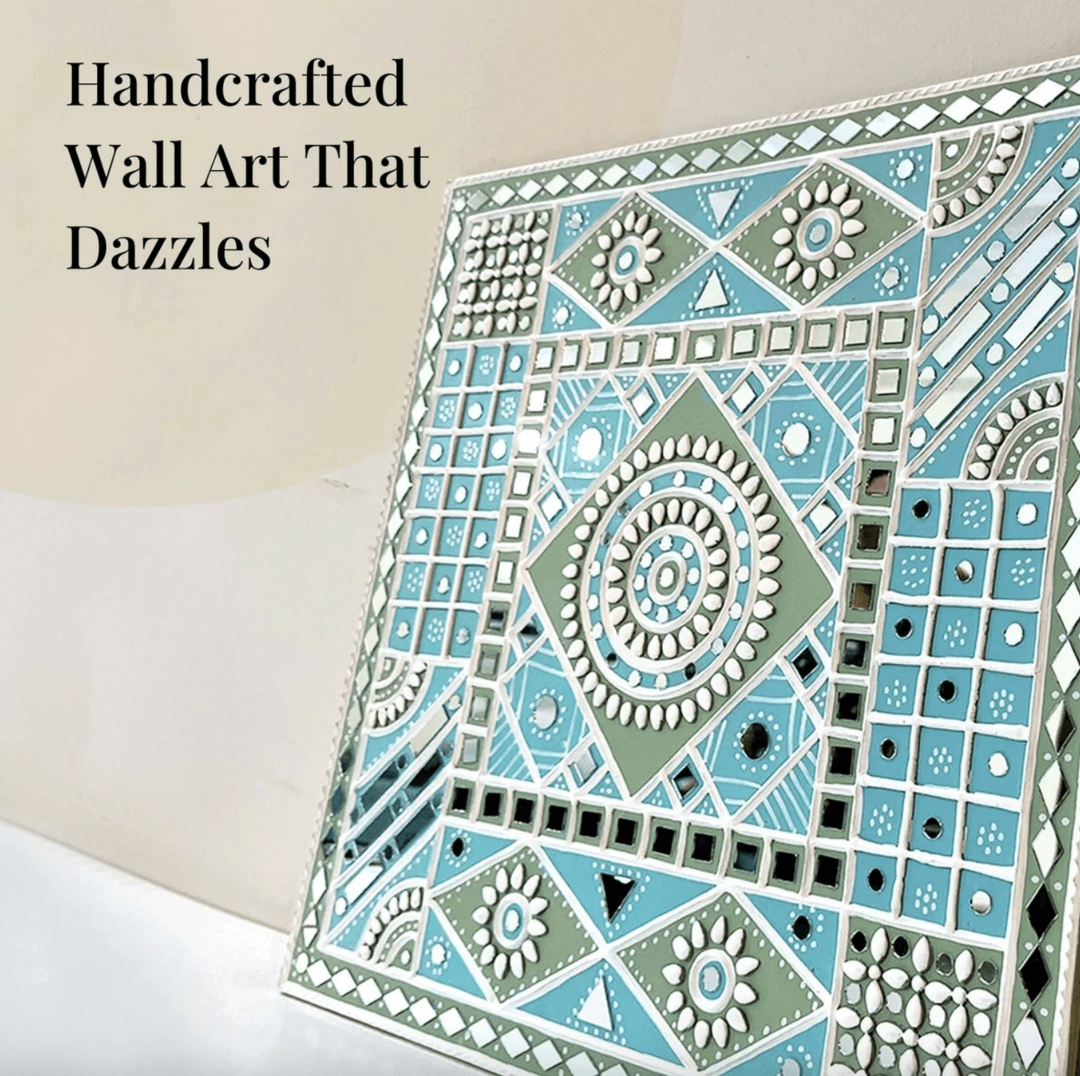
How to make Lippan Art: Step-By-Step Craftsmanship of Mud & Mirror Work
• By Anamika Choudhury
• 2025-12-22
• 24 mins read
Lippan art is a traditional craft from Kutch, Gujarat, and is created by shaping mud into patterns and embedding small mirrors to form reflective, textured designs. It is made with mud because clay is easy to mould, dries naturally, and creates raised motifs that hold their shape. Mirrors are used because they catch light, brighten dim mud homes and add an ornamental sparkle that makes even simple designs look intricate. The process involves preparing a smooth clay mixture, outlining a pattern and then building it step by step using hand-rolled coils and mirrors.
Lippan art began as a functional craft that decorated village walls, but today it has become a popular home art form because it is simple to learn, uses natural materials and produces beautiful results even at a beginner level.
Materials Need to Make Lippan Art
Lippan art requires only a few materials, but understanding why each item is used helps you work more confidently. Whether you're making a small piece on MDF or a larger wall-mounted artwork, the right supplies ensure clean lines, strong bonding and a polished finish. Below is a detailed list that explains each material and how it contributes to the craft.
- Clay or mud mixture Traditionally, Lippan art is made from a mix of clay and camel dung, which gives strength, adhesion and flexibility. For home projects, you can use air-dry clay, ceramic clay or a homemade mix of clay, fevicol and a little water. The mud mixture forms the coils, motifs and raised patterns, so choose a clay that stays soft while working but dries firm without cracking.
- MDF board or a prepared wall surface MDF is the most beginner-friendly base because it is smooth, sturdy and easy to mount. A board between 6 and 12 mm thickness works well for small to medium pieces. If creating Lippan directly on a wall, ensure the surface is clean, primed and slightly textured so the clay adheres properly.
- Decorative mirrors in various shapes Mirrors are the signature element of Lippan art. Round, square, teardrop and diamond-shaped mirrors create rhythm and symmetry in the design. They reflect light beautifully and enhance the dimensional effect of the raised mud work. Always choose mirrors with smooth edges for safety and a clean finish.
- Fevicol or natural binders Fevicol is used to fix mirrors securely and strengthen the mud mixture. Some artists also mix a small amount of binder into the clay to reduce shrinkage. The adhesive ensures your artwork lasts long and does not shed pieces over time.
- Butter paper or tracing sheet These help in transferring motifs, repeating patterns and maintaining symmetry. If you're not confident drawing directly on the base, sketching on butter paper and lightly tracing it onto the board gives you clean guidelines to follow.
- Acrylic paints or natural pigments (optional) Many artists prefer the traditional white or earthy look of raw clay, but acrylic paints allow colour customization. You can choose matte, satin or metallic shades depending on the theme. Paints are typically applied after the artwork dries completely.
- Shape and detailing tools Tools such as clay rollers, palette knives, smoothening sticks, toothpicks, cotton buds or sculpting tools help refine the design. These tools allow you to shape uniform coils, clean edges, and smooth surfaces, making the final artwork look neat and professional.
With these materials ready before you start, the entire Lippan process becomes easier, cleaner and much more enjoyable, even for beginners attempting it for the first time.
How to Prepare the Mud Base for Lippan Art
The mud base is the heart of Lippan art, and preparing it correctly is what gives the artwork strength, smoothness and the traditional handcrafted look. Whether you choose a traditional clay mixture or a modern alternative, the goal is to create a soft, malleable dough that holds shape while working and dries without cracks. Taking a little extra care during this stage makes the entire process smoother and ensures a clean, long-lasting finish.
Traditional Clay and Dung Mix
Artisans in Kutch traditionally use a blend of clay and camel dung because the fibres in dung act like a natural reinforcement. Since camel dung is not accessible to everyone, you can replicate a similar texture by using clay mixed with a fibrous binder like fevicol or a tiny amount of paper pulp.
- Mix 3 parts clay with 1 part binder (Fevicol + a splash of water)
- Knead until smooth, soft and slightly elastic
- The mixture should roll into coils without cracking at the edges This version stays closest to the authentic look while being practical for home use.
Modern Clay Alternatives for Easy Handling
If you want a simpler, cleaner approach, modern materials work beautifully and reduce drying issues:
- Air-dry clay gives smooth results and holds mirror placement well
- Ceramic clay offers a traditional matte finish
- Shilpkar or epoxy clay can be used for detailing but sets faster For beginners, air-dry clay is the most forgiving because it stays soft longer and dries evenly.
How to Knead the Clay Correctly?
Proper kneading removes air bubbles and ensures a consistent texture.
- Add water gradually; the clay should feel moist but never sticky
- Knead for 5 to 7 minutes to reach a soft dough-like consistency
- Test by rolling a small coil: if it cracks, add a few drops of water Good kneading helps the clay stick to the board and prevents uneven drying.
How to Store the Mud Mix and Avoid Cracks?
Clay dries quickly when exposed to air, so storing it correctly is important.
- Wrap unused clay in damp cloth and place in an airtight container
- Avoid adding too much water to fix dryness; it weakens the clay
- Keep the clay at room temperature; cold environments make it stiff For the artwork itself, cracking can occur if the base is too thick or dries too fast. Dry in shade rather than direct sun to prevent shrinkage lines.
Preparing the mud base with care ensures your Lippan art has smooth coils, clean details and a strong structure that lasts for years.
How to Prepare the Baseboard?
Preparing the base correctly is just as important as preparing the clay. A smooth, clean and slightly textured surface helps the clay adhere well, prevents peeling and ensures that your final artwork looks crisp and professional. Whether you are working on an MDF board or directly on a wall, the goal is to create a stable foundation that supports the weight of the clay and mirrors.
Preparing an MDF Board for Lippan Art
MDF is the most beginner-friendly choice because it offers a firm, uniform surface.
- Choose the right thickness: Boards between 6 and 12 mm work best. Thinner boards may warp, while thicker ones become unnecessarily heavy.
- Sand the surface lightly: Use fine-grit sandpaper to remove factory sheen. This helps the clay grip better.
- Prime the board with a thin coat of white paint or gesso: This seals the surface and prevents the clay from absorbing moisture unevenly. Allow it to dry completely.
- Mark your layout lightly: Use a pencil or chalk to draw guidelines. Keeping the markings soft ensures they don’t show through your clay work.
Preparing a Wall Surface for Lippan Art
If you want a traditional, wall-mounted piece, proper preparation prevents cracking or detachment.
- Start with a clean wall: Remove dust, oil or loose paint. A slightly rough texture helps the clay stick better than a smooth wall.
- Apply a primer or base coat: A simple latex primer works well, providing the right amount of grip.
- Ensure the wall is fully dry: Moisture trapped behind clay may cause bubbles or peeling later.
- Mark your central design lines: Use a level scale and measuring tape to keep patterns symmetrical across the wall.
Drying Time Before Starting Work
Both MDF boards and walls need at least 2 to 4 hours of drying time after priming. The surface should feel matte, not tacky, before clay or mirrors are applied.
A well-prepared baseboard ensures your coils sit neatly, mirrors stay in place and your final Lippan art has a smooth, professional finish.
Creating Your Lippan Design Outline
Before you begin shaping coils or placing mirrors, it’s essential to build a clear design outline. This step sets the structure for the entire artwork and ensures your final piece looks symmetrical, balanced and intentional. Whether you choose traditional motifs or modern patterns, taking time to map out the design makes the crafting process much smoother.
Choosing Motifs That Suit Lippan Art
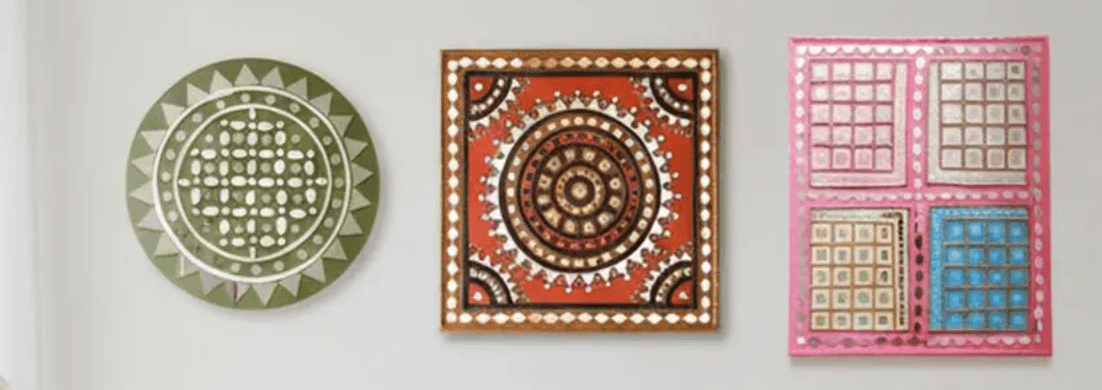
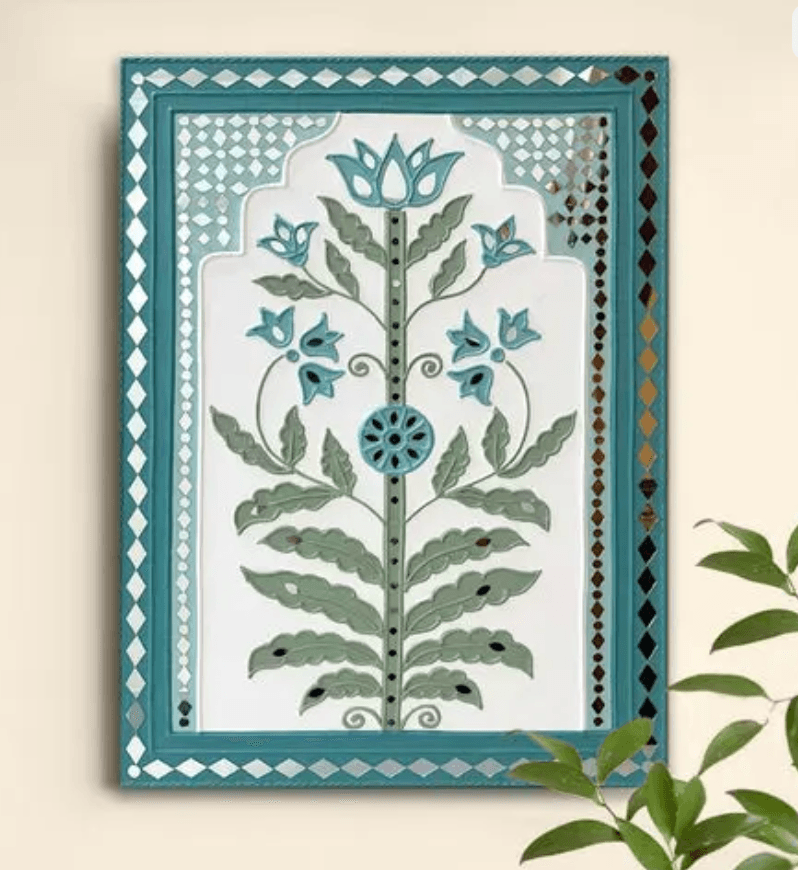
Lippan art traditionally features geometric patterns, floral forms, peacocks, mandalas and sun motifs. Beginners often find it easier to start with repetitive shapes or simple symmetry, as these are forgiving and naturally suit mirror placements. If you prefer modern designs, minimalist lines and abstract patterns work well too.
Sketching the Outline Lightly
Using a pencil, lightly sketch the basic structure of your design on the MDF board or wall. Keep the lines faint so they don’t show through the clay. Focus on the flow of the pattern rather than perfect detailing at this stage. Clean outlines help you place coils confidently later.
Using Stencils or Tracing for Cleaner Shapes
If you want precise circles, diamonds or mandala-like symmetry, tracing sheets or stencils are very helpful.
- Place butter paper over your chosen motif
- Trace the design
- Flip it onto the board and rub gently to transfer the outline This technique keeps proportions accurate, especially if your artwork includes repeated patterns.
Planning Mirror Placement Before Adding Clay
Mirrors look best when their placement is intentional. Before applying any clay, place mirrors loosely on the board to test spacing.
- Keep even distances between mirrors
- Align mirrors with the design’s visual flow
- Avoid overcrowding, which can distract from the clay work Once you’re satisfied with the layout, remove the mirrors and start clay work with a clear understanding of where each mirror will sit. Creating a clean, well-planned outline ensures that the entire artwork feels cohesive and helps you maintain symmetry and precision when you move on to the clay application stage.
Step-by-Step Process: How to Make Lippan Art at Home
This is the core of the craft. Once your base and outline are ready, you can begin shaping the clay and building your artwork layer by layer. The key here is patience, consistency and gentle handling. Each step adds structure and detail, and together they create the raised, mirror-studded look that defines Lippan art.
1. Roll the Clay Into Even Coils
Take small portions of your prepared clay and roll them into long, thin coils using your palms. Aim for a steady thickness throughout the length, as uneven coils can disrupt the flow of the design. Each coil should be soft enough to bend but firm enough to hold shape.
2. Shape the Coils to Match Your Outline
Place each coil along the guiding lines you sketched earlier. Curve, bend or pinch the clay gently to match every twist and corner of the design. Working in small sections helps maintain control and prevents the clay from drying before placement.
3. Press the Coils Lightly Onto the Base
Once aligned with the outline, press the coils lightly so they bond with the surface. Avoid flattening them too much. You should still see a raised, rounded edge, as this gives Lippan art its dimensional texture.
4. Smooth the Edges for a Clean Finish
Dip your fingers in a tiny amount of water and smooth the edges of each coil. This step blends the clay into the base, removes cracks and makes the artwork look polished. Use clay tools or cotton buds for tight corners and narrow spaces.
5. Add Mirrors at the Right Stages
Place mirrors while the clay is still soft, so they settle into the design securely. Dab a tiny amount of fevicol under each mirror before positioning it. Press gently until the mirror sits flush with the clay without sinking too deep.
6. Level the Surface and Adjust Final Details
After placing the coils and mirrors, look at the entire piece from different angles. Adjust any uneven lines or lifted edges. Coils should appear uniform, and mirrors should follow the rhythm of the design without overlapping.
7. Allow the Artwork to Dry Naturally
Lippan art dries best at room temperature in a shaded area. Sun drying can cause cracks or shrinkage. Depending on the clay thickness, drying may take anywhere from one to three days. Avoid touching the artwork during this stage.
8. Reinforce With Binder for Long-Term Strength
Once completely dry, you may apply a thin layer of diluted fevicol over the clay lines using a soft brush. This strengthens the structure, prevents flaking and ensures the artwork lasts longer, especially on MDF boards.
9. Optional: Painting or Sealing the Artwork
If you prefer a coloured finish, apply acrylic paint only after the piece is fully dry. For a traditional look, leave the clay natural and use a matte or satin sealant to protect the surface and enhance durability.
Completing these steps carefully results in a clean, balanced and beautifully crafted Lippan artwork that reflects both tradition and your personal touch.
Tips to Make Your Lippan Art Look Clean and Perfect
Even simple Lippan designs can look stunning when finished neatly. The difference between a beginner-looking piece and a polished, professional one often comes down to consistency, spacing and finishing. Paying attention to these small details helps your artwork look symmetrical, refined and visually balanced.
Maintain even coil thickness throughout the design Coils that vary in size can make the pattern look uneven. Roll each coil slowly and check its thickness by running your fingers across the length. Consistency here creates cleaner lines and a smooth flow across the artwork. Keep mirror spacing uniform for symmetry Before fixing mirrors permanently, place them loosely over the layout to check alignment. Equal spacing makes the design look structured and intentional, especially in geometric or mandala-style motifs. Smooth the clay edges carefully for a polished finish Use slightly damp fingers or a cotton bud to blend the edges of each coil into the board. This removes cracks, rough joints and fingerprints, giving the piece a more professional, handcrafted appearance. Work in small sections to avoid drying issues Completing your outlines and mirror placements in smaller parts helps maintain control over the clay. This prevents one area from drying out while you're working on another and keeps the entire piece looking uniform. Check symmetry from different angles Step back occasionally and view the artwork from the front and sides. Symmetry errors are easier to spot from a distance, and correcting them early ensures a balanced final design. These simple but effective techniques elevate your Lippan art and help you achieve the clean, crisp look that defines traditional craftsmanship.
Common Mistakes to Avoid When Making Lippan Art
Beginners often face the same challenges when working with mud and mirrors. Knowing these mistakes in advance helps you create cleaner artwork, avoid cracks and ensure your design stays intact for years. Here are the most common issues and how to prevent them:
Using clay that is too dry or too wet Overly dry clay cracks while shaping, and overly wet clay loses structure. Aim for a soft, dough-like consistency that holds its shape without crumbling or sagging. Rolling uneven coils Thick and thin coils placed together make the design look irregular and can cause drying issues. Roll slowly and evenly, checking thickness frequently as you work. Overusing water during smoothing Water helps in refining edges but too much can weaken the clay, leading to cracks later. Use only a slightly damp fingertip to refine the lines. Placing mirrors without enough adhesive Mirrors often fall off if glued onto damp clay or with too little binder. Always press them gently into place and allow the base to grip before moving on. Letting the artwork dry unevenly If one side receives more air or sunlight, it can warp or crack. Always dry your artwork in a shaded, well-ventilated area and rotate it occasionally. Skipping proper surface preparation Clay does not adhere well to dusty, rough or unprepared surfaces. If using MDF or a wall, make sure it is primed and clean before applying clay. Avoiding these small yet common mistakes ensures your Lippan art remains smooth, symmetrical and long-lasting.
How Long Does Lippan Art Take to Dry?
Drying time for Lippan art depends on the thickness of the clay, the weather, and whether you're using traditional mud or a modern clay mixture. In general, Lippan art takes 24 to 72 hours to dry fully, but each layer behaves differently.
Thin coils dry faster Slim, even coils may dry within 24 hours, especially in warm weather. Thicker elements take longer If your design includes raised motifs or thicker clay sections, expect 48 to 72 hours for complete drying. Weather plays a major role In humid climates, drying can slow down significantly. Always allow extra time during monsoon or winter months. Sun drying vs shade drying Direct sunlight dries the clay quickly but can cause cracks. The safest method is drying in shade with good airflow, rotating the piece occasionally so the moisture escapes evenly. Check before sealing or painting The artwork must be fully dry to the touch with no cool patches before adding paint or a sealant. Applying finishes too early can trap moisture and damage the artwork over time.
Proper drying prevents cracks, keeps the clay strong, and ensures your mirrors stay secure.
How to Add Color or Finish to Lippan Art?
Adding colour or finishing touches is optional in Lippan art, but it can enhance durability and refine the final look. Traditionally, Lippan art is left in its natural white or earthy tones, but modern versions often use subtle colour or protective coatings.
1. Decide Whether to Keep It Natural or Coloured
Traditional Lippan pieces are appreciated for their raw clay texture and mirror shine. If you prefer the classic style, simply smooth the dried surface and leave it unpainted.
2. Using Natural or White Clay Finishes
If you want the timeless white Lippan look, apply:
- A thin coat of white clay slip over the dried artwork
- OR a lime-based wash for a rustic, authentic appearance
Both keep the piece breathable and earthy.
3. Painting the Artwork (Modern Style)
Acrylic paints work best because they adhere well and dry quickly.
- Use neutral or earthy tones to preserve the traditional feel
- Apply colour only on the background or raised motifs—not on mirrors
- Thin layers prevent cracking and help maintain fine coil details
4. Matte or Glossy Sealants
Sealants protect your Lippan art from dust and moisture and give it a refined finish.
- Matte varnish keeps the clay's natural texture
- Gloss varnish adds shine, often preferred for contemporary décor Always ensure the artwork is fully dry before applying any sealant.
5. When Should You Paint or Seal?
- Paint after the clay has dried completely
- Seal only after all paints have cured This helps prevent moisture trapping and ensures long-term durability.
6. Highlighting Mirrors Carefully
When finishing near mirrors:
- Wipe accidental paint smudges immediately
- Avoid flooding the edges with varnish
- Keep reflective surfaces clean so they catch light beautifully A thoughtful finish not only elevates your piece visually but also ensures it lasts for years.
Preserving and Maintaining Your Handmade Lippan Art
Once your Lippan art is complete, proper care ensures it stays beautiful for years. Because the craft uses clay and mirrors, it needs gentle handling and a clean, dry environment.
1. Keep It Away from Moisture
Clay absorbs moisture easily, which can weaken the structure or loosen mirrors.
- Avoid hanging Lippan art in bathrooms, balconies, or damp corners.
- If you live in a humid area, consider applying a light sealant for protection.
2. Dust Regularly and Gently
Dust builds up around coils and mirrors.
- Use a soft, dry brush or microfiber cloth to sweep over the surface.
- Avoid wet cleaning methods unless the artwork is sealed. 3. Protect Mirrors from Smudges
Mirrors attract fingerprints and dullness.
- Wipe them gently with a cotton swab.
- Do not use harsh cleaners; a dry cloth is enough for maintenance. 4. Mount It Safely
Lippan art is heavier than regular wall decor.
- Use strong wall hooks or brackets suitable for the artwork’s weight.
Ensure the backing (MDF or wood) is sturdy and has proper hanging hardware. 5. Keep It Out of Harsh Sunlight
Direct sunlight can lighten colours and dry out the clay excessively. Place it on walls that get soft, indirect light to help it last longer.
6. Handle with Care
Avoid pressing or tapping the surface. The coils and mirrors can shift or crack if pushed.
With simple maintenance habits, your handmade Lippan art will stay vibrant, textured, and full of character for many years. If you want authentic handcrafted pieces, you can buy Lippan art online from PeepulTree, where artisan-made designs pair beautifully with warm brass décor for a rich, ethnic look.

Wall Art Handmade with Mud and Mirrors | Olive Colour | Lippan Art | Handmade in India - 8 inches X 8 inches / Clay & Mirrors on Ply / Olive

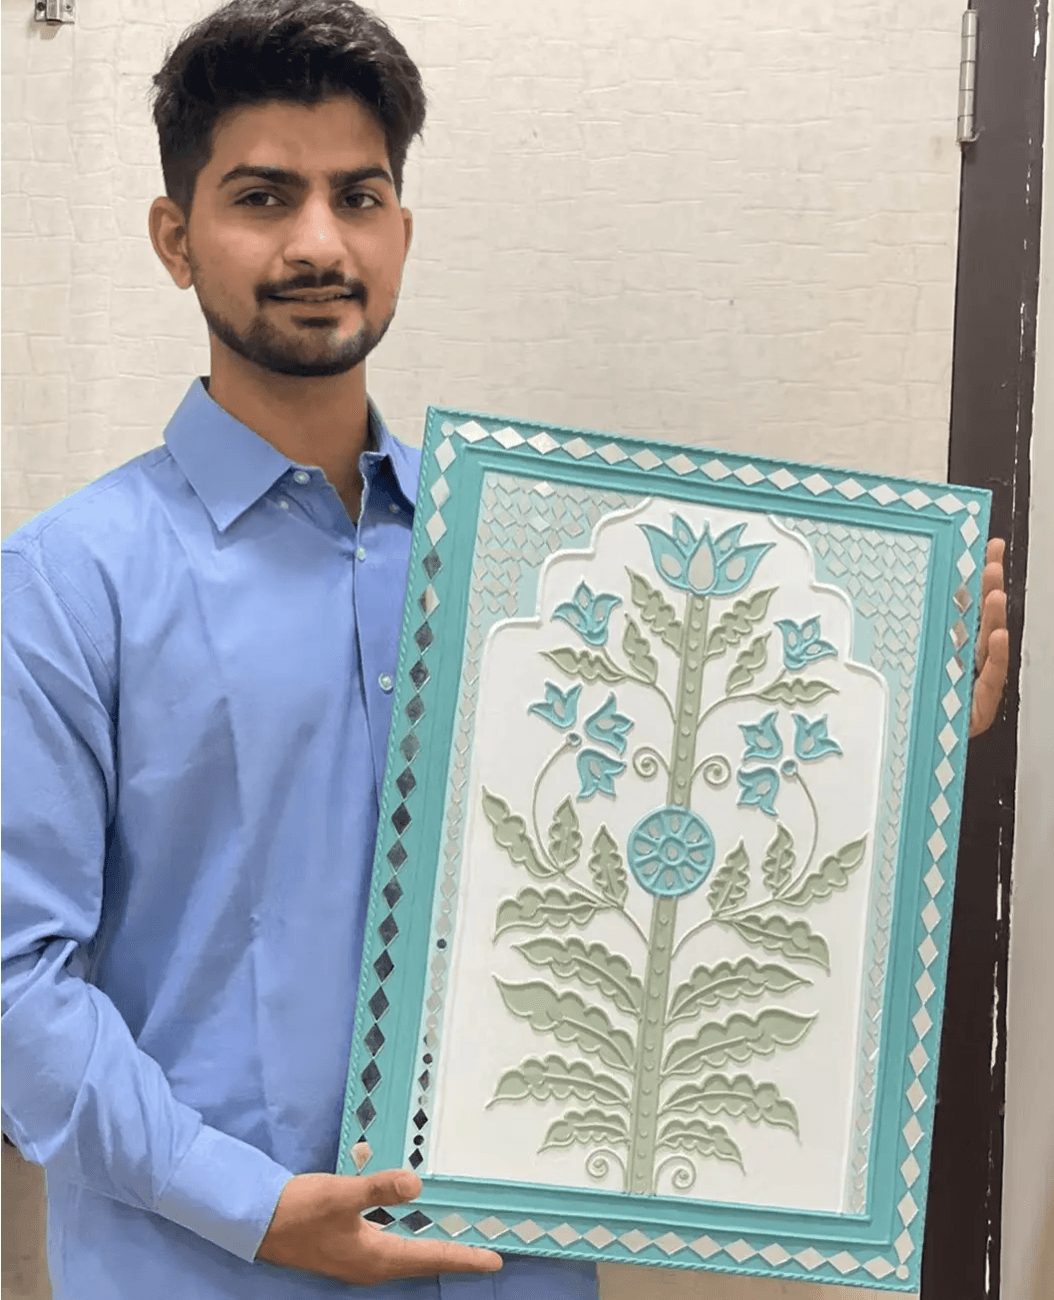
Wall Hanging made with Mud Art Ocean Blue Sparkles Handmade | Lippan Art - Light-blue, White & light-green / 18 inches X 18 inches / Clay & Mirrors on Ply

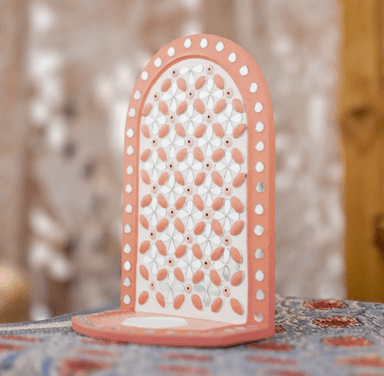
Tealight Holder in Green Colour Handcrafted with Mud and Mirrors in the Lippan Craft from Kutch Area | Add a Warm Glow to Your Home

Tealight Holder in Dusty Pink Colour Handcrafted with Mud and Mirrors in the Lippan Craft from Kutch Area| Add a Warm Glow to Your Home

Multicoloured Handcrafted Dazzle Mud Wall Art - 16 inches X 14 inches / Clay & Mirrors on Ply / Multicoloured
You May also Like
Benefits of Choosing Eco-Friendly Home Decor
• By Anamika
• 2026-01-07
Why choose Handmade Products over Mass-Produced Products
• By Anamika
• 2026-01-07
Lippan Art vs Other Indian Wall Arts: Key Differences & Which Is Best for Your Home
• By Richa Kumari
• 2026-01-02
How to Choose the Right Lippan Art Size for Your Wall | Expert Sizing Guide
• By Richa Kumari
• 2026-01-02
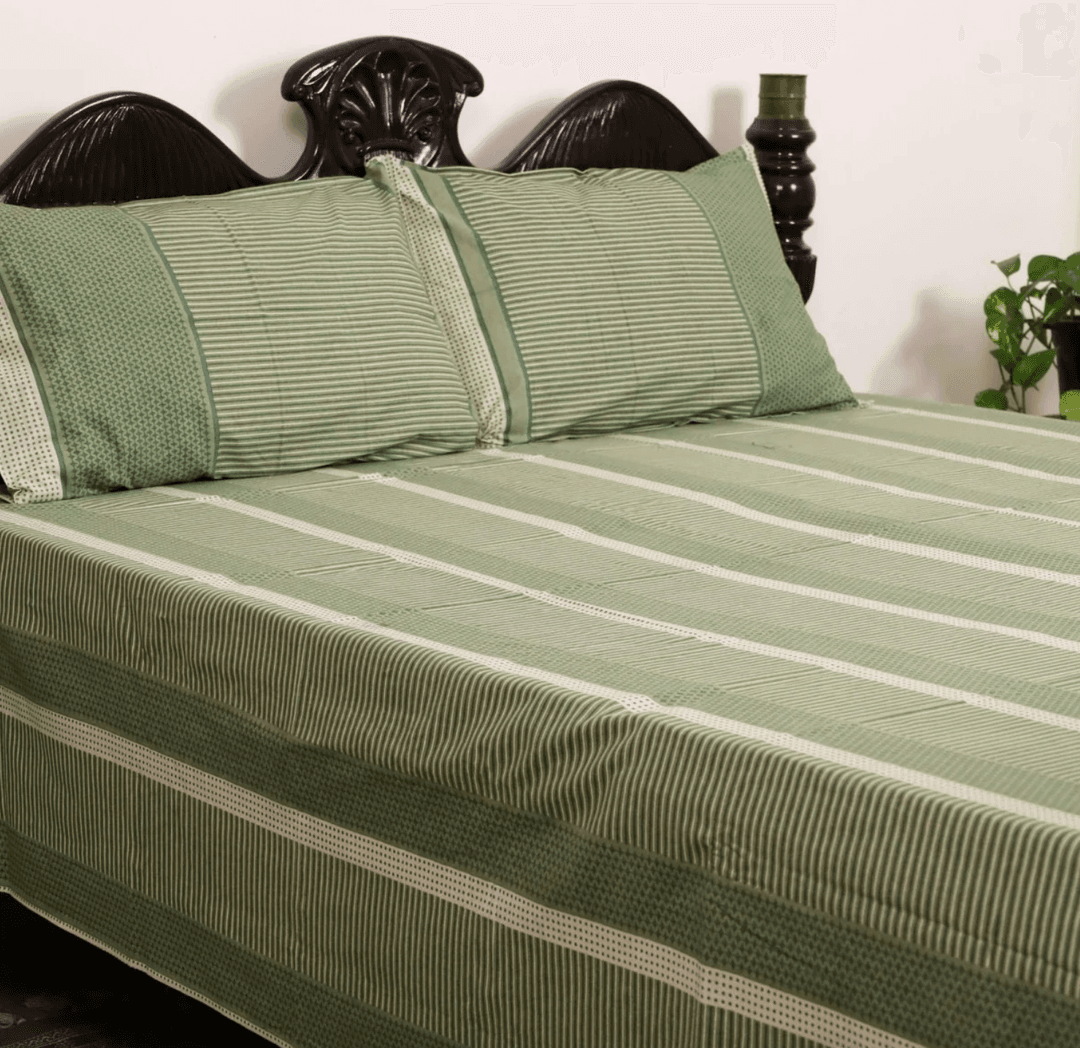
How to Select the Right Bedsheet for Summer, Winter & Monsoon
• By Richa Kumari
• 2026-01-02
Frequently Asked Questions
Can beginners make Lippan art?
Yes, beginners can make Lippan art easily by learning the basic coil-shaping and mirror-placing techniques. It’s a beginner-friendly craft.
Which clay is best for Lippan art?
Natural clay mixed with a binder is traditional, but air-dry clay or ceramic clay works well for home projects because it is easier to handle.
How thick should the coils be?
Coils should generally be 3–5 mm thick so they hold their shape, dry evenly, and do not crack.
Should I paint before or after drying?
Always paint or seal after the artwork is fully dry to avoid smudging, peeling, or uneven finishing.
How long does Lippan art last?
With proper care and protection from moisture, Lippan art can last for many years without losing its texture or mirror shine.